Paper Bag Lion Puppet

Home >> Learning Nest >> Shop
This paper bag lion puppet activity is designed to be more than just a craft. It is an opportunity for students in grades K–3 to combine art, science, and language development in one meaningful lesson. Students will explore basic facts about lions, including where they live, what they eat, and how they survive in the wild. As they build their puppet step by step, parents and teachers can pause to ask questions, introduce new vocabulary, and encourage complete sentences. This transforms a simple hands-on project into an engaging learning experience that supports both scientific understanding and early literacy skills.
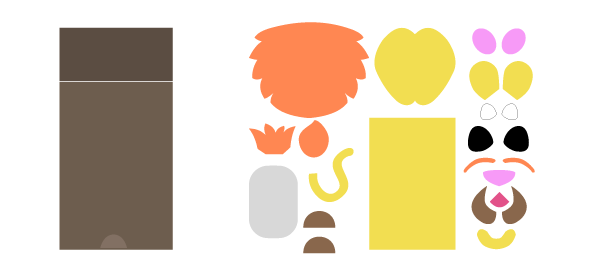
Students will begin by coloring the lion pattern pieces or using the patterns as templates to trace onto construction paper. After cutting out each piece, they will glue them onto a brown paper lunch sack to create their lion puppet. For detailed, step-by-step assembly directions, please read below. Embedded teaching opportunities in science and language arts are also available on the site to help parents and teachers extend the lesson and intentionally build comprehension, vocabulary, storytelling, and critical thinking skills throughout the activity.
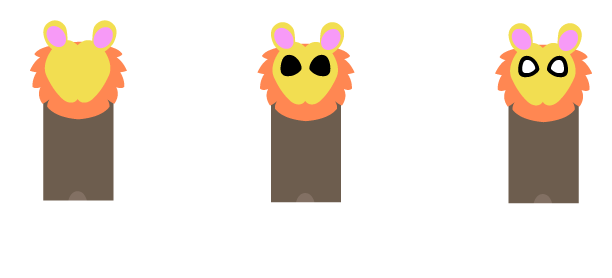
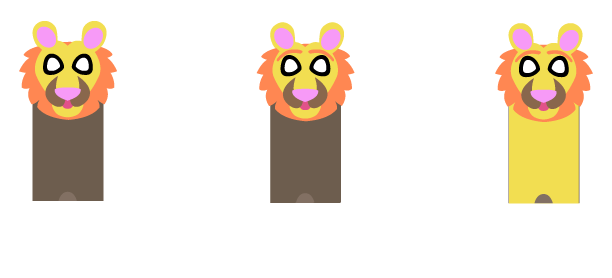
Step 1: Glue the Mane, Head, and Ears
Begin by gluing the lion’s mane onto the brown paper lunch bag. Next, glue the head on top of the mane, and then add the ears. As you work, explain to your child that only male lions have large manes. The mane helps protect their neck during fights and also makes them look bigger and stronger to other animals. This is a good time to introduce the word “pride.” A pride is a group of lions that live together. Ask your child if they think their puppet is a father lion who protects his pride. For an ELA (English Language Acquisition) connection, have your child say a complete sentence such as, “A lion lives in a pride.” Encourage them to speak clearly and use full thoughts.

Step 2: Glue the Inner Ears, Eye Ring, and Eyes
Now glue the inner ears, the black rings around the eyes, and then the white parts of the eyes. As your child builds the face, talk about how lions have excellent hearing and vision. Their ears can turn to catch sounds from far away, and they can see very well at night. Ask your child what they think lions hunt and guide them toward understanding that lions hunt animals like zebras and antelope. Introduce descriptive words such as “alert,” “focused,” and “watchful.” Ask your child to describe the lion’s eyes using strong adjectives. This strengthens vocabulary and observation skills.
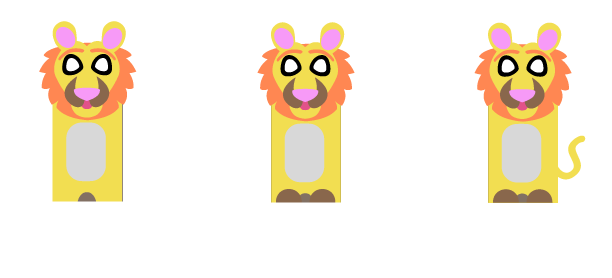
Step 3: Glue the Tongue, Bottom Lip, and Snout
Glue the tongue first, then the bottom lip, and finally the snout. Explain that lions are carnivores, which means they eat meat. Their tongues are rough and help them scrape meat from bones. You can have your child gently touch their own tongue and compare it to what they imagine a lion’s tongue feels like. Point out that the whiskers on a lion’s snout help it sense movement and objects in the dark. For language development, say the word “carnivore” together and clap the syllables. Then ask your child to complete a sentence such as, “A lion is a carnivore because it eats meat.”
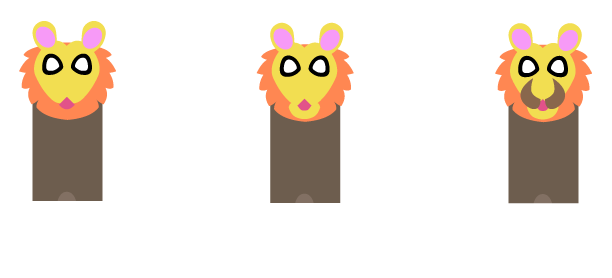
Step 4: Glue the Nose, Eyebrows, and Skin
Glue the nose in place, followed by the orange eyebrows and the yellow-colored skin. Talk about how a lion uses its nose to smell prey from far away. Explain that a lion’s golden fur helps it blend into the dry grasslands of Africa. This is called camouflage. Ask your child why it would be helpful for a lion to blend in with tall grass. Help them think through how this helps lions sneak up on prey. For an ELA extension, have your child describe the lion’s fur using words like “golden,” “soft,” “thick,” or “rough.” Encourage them to build a descriptive sentence.
Step 5: Glue the Tummy, Paws, and Tail
Next, glue the tummy, then the brown paws, and finally the tail. Explain that lions have strong paws with sharp claws that help them run, catch prey, and protect themselves. Their tail helps with balance when running quickly. It also helps swat flies away. You can turn this into a quick movement break by asking your child to pretend to run like a lion and then balance on one foot. For vocabulary practice, introduce action words such as “stalk,” “pounce,” and “chase.” Ask your child to use one of these words in a complete sentence about their lion puppet.
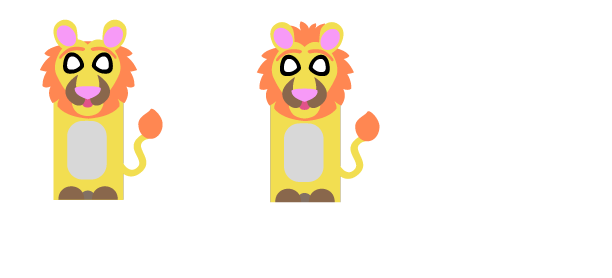
Step 6: Glue the Tail Tip and the Tuft of Hair
Finally, glue the tail tip and the tuft of hair on top of the lion’s head. Explain that the tuft at the end of the tail may help protect the tail and signal movement to other lions in the pride. Remind your child that female lions usually do most of the hunting, while male lions often protect the pride and guard their territory. Now that the puppet is complete, use it for storytelling. Ask your child to name their lion and describe where he lives, what he eats, and who is in his pride. Encourage them to tell a short story with a beginning, middle, and end. This final step turns a simple craft into a science lesson and a language arts activity that strengthens vocabulary, comprehension, and creative thinking.
—